
Outdated This tutorial is for the old pipeline. Please refer to the new one. In this tutorial We'll be rigging a custom Marth model and replacing Link. This tutorial aims to be friendly for newbies, so expect a bit of redundancy. Even though the aim is to be friendly to Blender newcomers, I highly suggest you know at least the basics before continuing. Skriller turned this process into a video tutorial, highly recommended that you go give it a watch!  You'll need
And if you know nothing about Blender, go here for a quick rundown. Actually, here's a video instead: https://www.youtube.com/watch?v=I-L57XSX70w Table of Contents Now let's get to it. Open DefaultLinkNoTex.blend in Blender. You should see a posed Link without any textures mapped to it.  Click the image to see the animation. Notice how the Rest Position is folded. This is how the game stores Link's skeleton by default, and it makes editing incredibly inconvenient. That's why we're going to apply the current pose as the new rest pose. Doing so right now would force Link into the rest pose, however, and we'd like to keep Link posed in case we need to use him as a reference. So let's bake the pose into his geometry first. Select Link, then go to the Modifiers tab and Apply the pose. 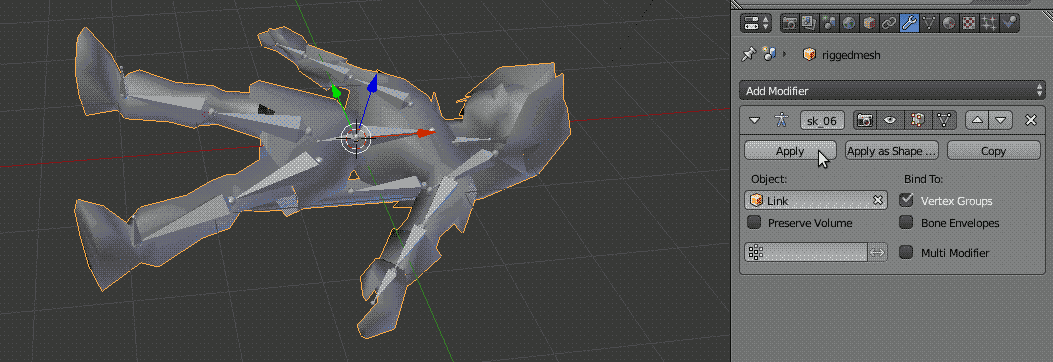 Now that the pose is baked to the model, let's also bake it to the skeleton. To do this, select Link's skeleton and enter Pose Mode. Go to Pose > Apply > Apply Pose as Rest Pose. 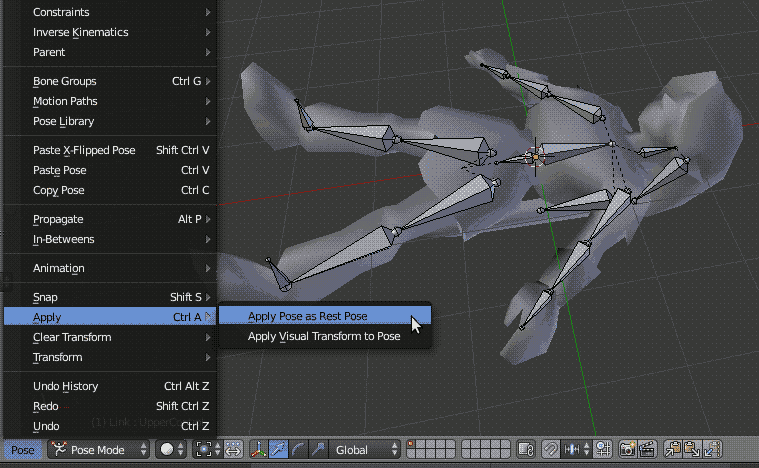 If you cycle between Pose Position and Rest Position now, you'll see no changes. We're done fiddling around with the poses until later. Let's import that OBJ and get rigging! File > Import > Wavefront (.obj) Navigate to Marth.obj and import it. 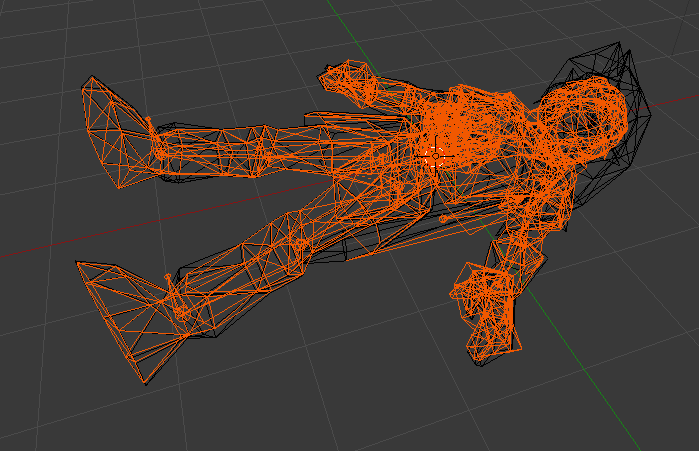 Looks like they line up fine. If they didn't, you'd have to scale and orient your import to match Link's general size/rotation. Select Link and press H to hide him, since he's just in the way at this point. Switch to Textured View and let's see what we have. 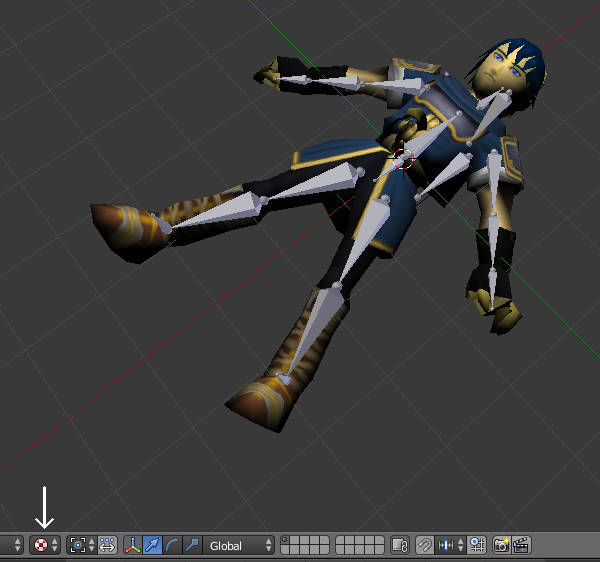 We need to start up the rigging process, and the first step is to select the mesh, then the skeleton. Make sure the skeleton is the one with the yellow outline, not orange. If it isn't, hold shift and keep trying to select it. You'll get it. Notice the skeleton's yellow outline in the below screenshot. Also keep in mind that you must be in Object Mode when doing this. Use the keyboard shortcut Ctrl P to bring up the parenting dialogue, and select With Empty Groups. Repeat for the following mesh groups: Fist.L, Fist.R, Bottle.Hand.L (the FPS models need not be rigged; actually, hide them for now) (and hide Fist.L, Fist.R, and Bottle.Hand.L when you're done with them, too) 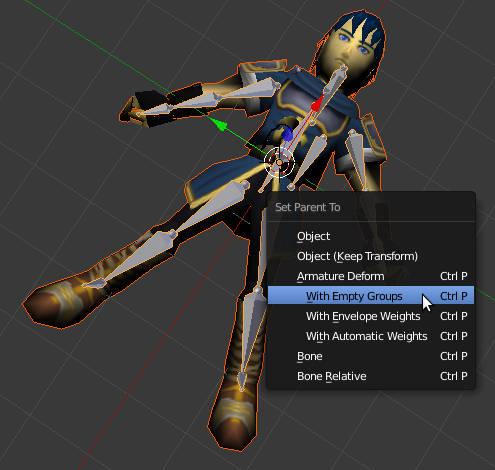 We're done with the skeleton for now, so let's hide it. Also, the scene is a bit dark, so press the N key, and select Shadeless in the sidebar. 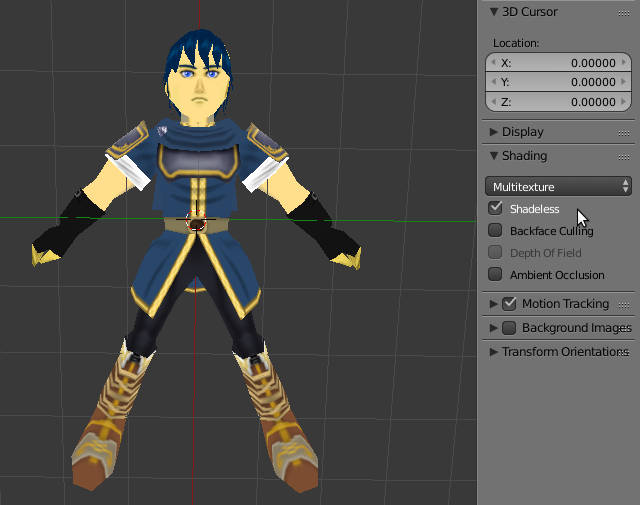 In case you get lost, here's how you change editing modes and selection modes. It's on the pane directly below the viewport.  Now select Marth and go into Edit Mode. It's also very important that you make sure you're in vertex select, not edge or face! Keep in mind throughout this process that you must take care not to assign any vertex to more than one vertex group, or you could encounter glitches. We're going to start with the left foot, so select these vertices and assign them to the Foot.L bone like in the screenshot: 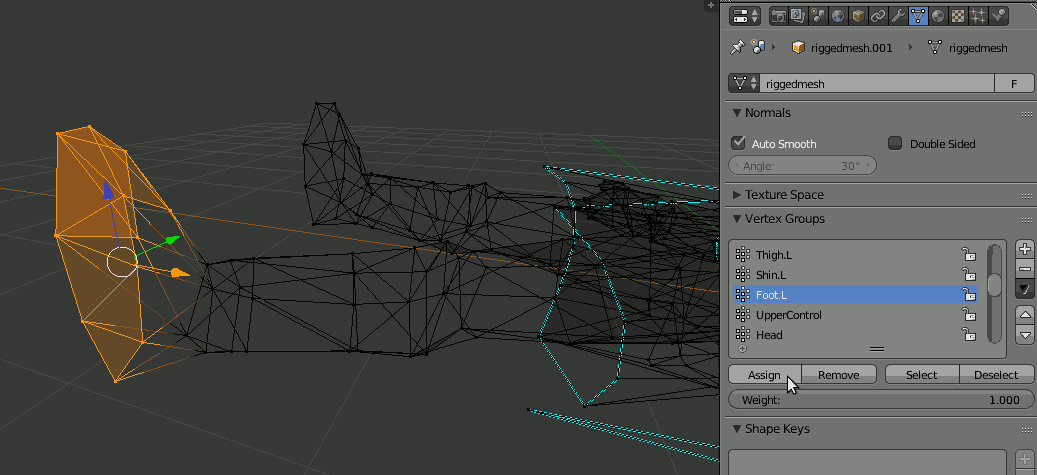 Tip: Wireframe View makes this easier sometimes. Toggle as needed by pressing the Z key. Let's talk about this Vertex Group menu for a second. There are four buttons: Assign, Remove, Select, Deselect. The vertices you have selected on the mesh, if you select a vertex group (Foot.L for example) and click the Assign button, they will be stored in that vertex group. Remove will remove them from the selected vertex group. Select and Deselect will select or deselect vertices belonging to the vertex group on the mesh. Keep this in mind throughout this tutorial. As you would expect, next we're doing Shin.L and Thigh.L, then repeating for the other leg. Having fun yet? By the way, UpperControl, LowerControl, and RootControl should never have any vertices assigned to them. Just letting you know as early on as possible. 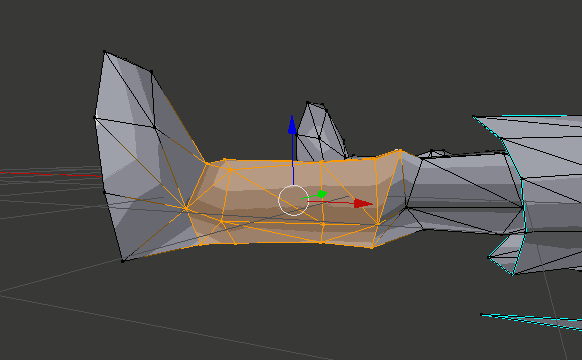 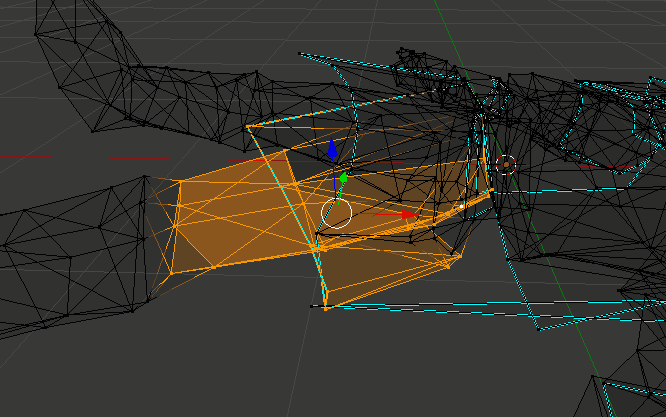 The thigh is always the trickiest one for me. Feel free to unhide (Alt H) Link as needed and see which vertices in his mesh are assigned to Thigh.L. Repeat for the other leg and then let's get to the Waist. 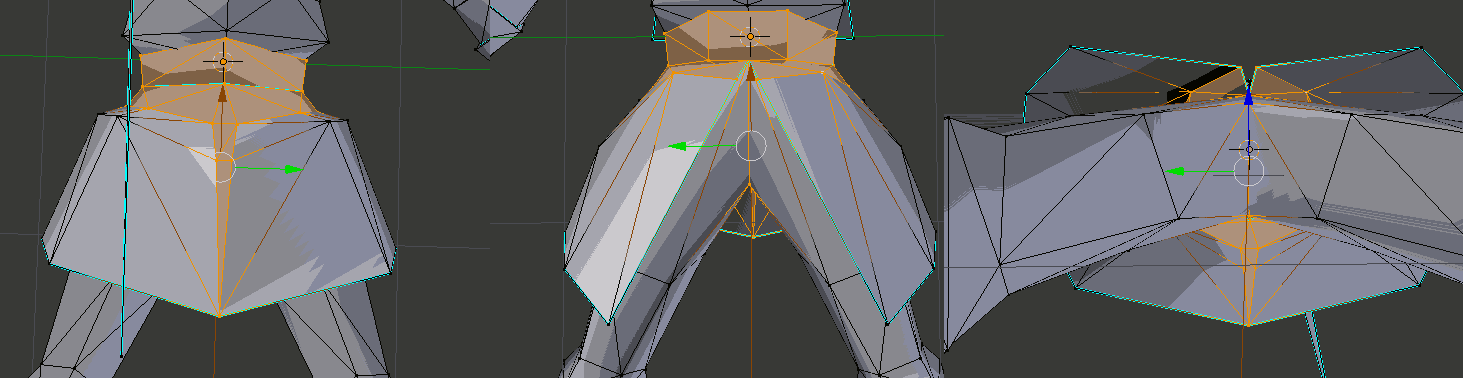 For the Waist, you assign all the vertices from the belt down, except for the vertices that have already been assigned to the legs. Does that make sense? Congratulations, you've through the super-challenging parts and it should be much easier from here! Don't get me wrong; the arms can be confusing at times as well, and even more-so the hat (if Marth had one), but if you can do the legs/waist, you can handle those. Don't expect any more screenshots about which vertices go where. Take care of the rest of the body now. Actually, here's one for the shoulder, since it may legitimately throw newcomers through a loop. So don't whine and say I didn't give you a reference for this one. 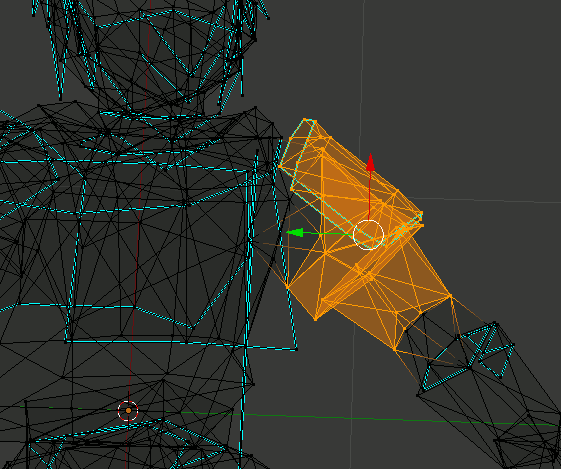  Tip: Press H on selected vertices to hide them. This will make doing the torso way easier! You can always unhide them by pressing Alt H. Once you've finished, go back into Object Mode and find the OBJEX panel. Click the Show Unassigned Vertices button to see if you missed any vertices.  If it tells you "There are no unassigned vertices!", just take the program's word for it. If you missed any vertices, make sure to assign them to the correct vertex group. If you don't know how to assign the triangle floating directly behind Marth, that's a placeholder for the Sheath model, so assign it to that. The game needs this or some things will mess up. As a fun bit of trivia, all the Link forms in Majora's Mask which don't even use sheaths still have a placeholder triangle to also serve this very purpose. With Marth's main mesh now rigged, let's move on to the fist models that we hid earlier. These are used when he's holding a sword/shield/etc. There's also the bottle hand. Use Alt H to unhide everything, then re-hide Link, the skeleton, and the FPS models. For each of the alternate hand models (Fist.L, Fist.R, and Hand.Bottle.L), select, go into Edit Mode, and assign the vertices to the vertex group that fits, return to Object Mode, and hide.. For example, Fist.L would be assigned to the vertex group Hand.L. Unhide (Alt H) the skeleton, select it, and enter Pose Mode. We're going to get folding. Remember the folded Link from before? That's what we're aiming for with this. Here's a list of the transformations that need to be applied (assuming you kept the default pose from the beginning):
And here's a GIF of the folding process...  You'll have to click it to see it animate. Now that he's folded, go into Object Mode and select his mesh. Just like with Link earlier, go into the Modifier tab and apply the armature. 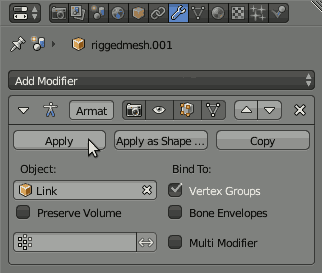 Repeat the above step for Fist.L, Fist.R, and Hand.Bottle.L! Now select the armature and go back into Pose Mode. Just like with Link, we're going to be applying the pose as the Rest Pose. 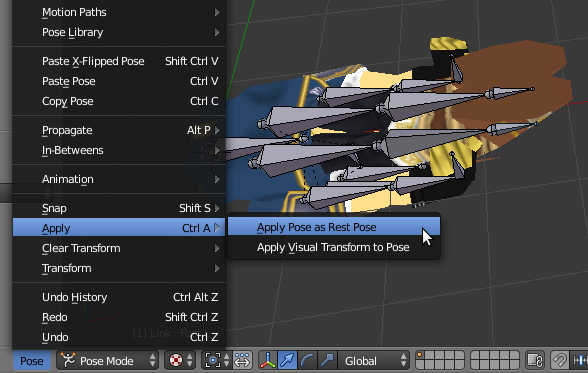 With the pose applied, select the mesh again and let's add an Armature modifier. 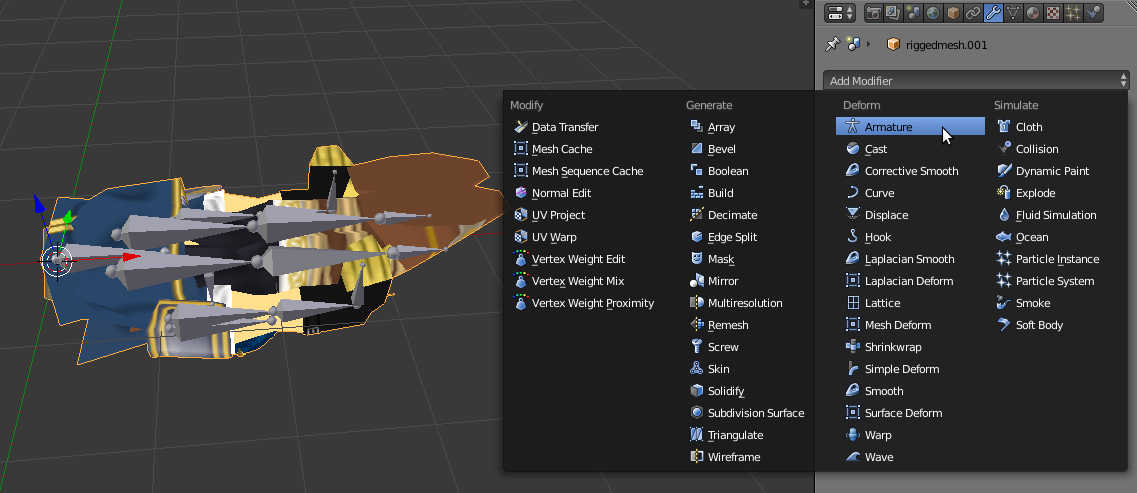 Set Object to Link (the name of the skeleton).  While you're at it, I suggest enabling these two settings for easier editing later: 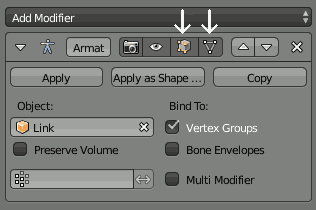 Now select the skeleton and enter Pose Mode. Unfold him by simply using the inverses of the rotations from before. Rotate the head forward 90 degrees instead of back 90 degrees, rotate the arms 45 degrees away from the torso instead of 45 degrees towards the torso, etc. 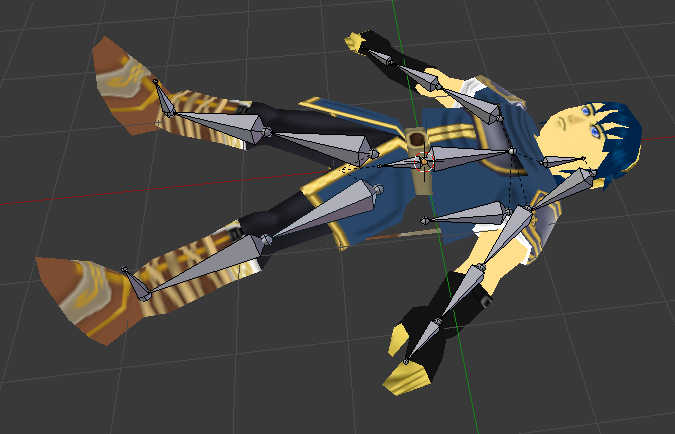 Good as new. The whole model is rigged now. You could very well export, convert, and import into the game right now, but something is bothering me. Skip this stuff if you want, but I'm throwing it in as a bonus for anyone not already familiar with these features. If you don't care or already know all this, skip ahead to Exporting.  See the weirdness going on with the neck and breastplate textures? Let's fix those. Starting with the neck texture. Select Marth and go into Edit Mode. Then, with Face Select, select one of the triangles with the texture applied. 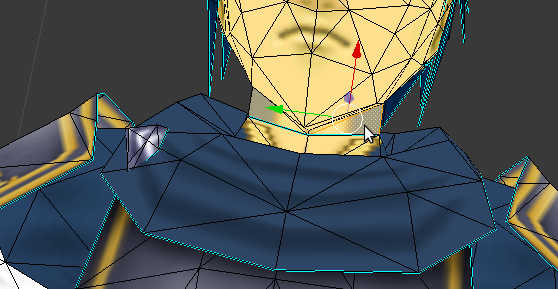 It's usually automatically selected and displayed in the UV/Image Editor. If it isn't, you will be able to locate it easily enough. Use this image as a guide: 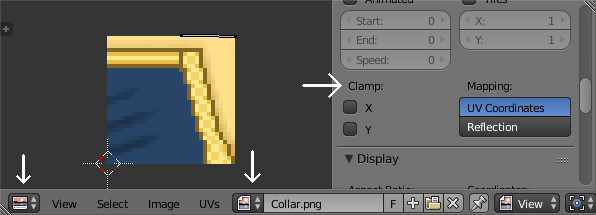 We're going to be enabling Clamp along both the X and Y axes.  That did it. Rinse and repeat for the breastplate and any other odd textures. There are cases where you may want to selectively clamp along X or Y instead of both. Take the boots, for example:  With clamping along Y on both of these textures, you get:  Use clamping any time you encounter problems like this. Let's set the gemstone he's wearing to be shiny/reflective while we're at it. Select it the same way we normally would. 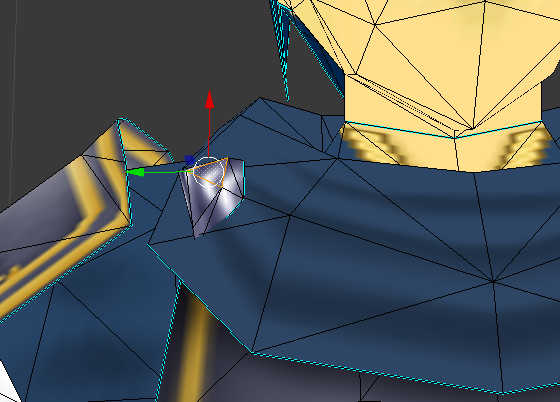 Locate the texture in the UV area, but instead of messing with the clamping, we're actually going to be clicking Reflective. When you're back in Object Mode, the gem will have different texture mapping based on the direction you look at it from. This is called texgen in the game, and that's how display lists like sword blades are shiny. While we're at it, let's also make the gem change color based on which tunic is equipped (Kokiri, Goron, Zora). With it selected, locate its material in the Material Panel, and append _ZZENV to its name. 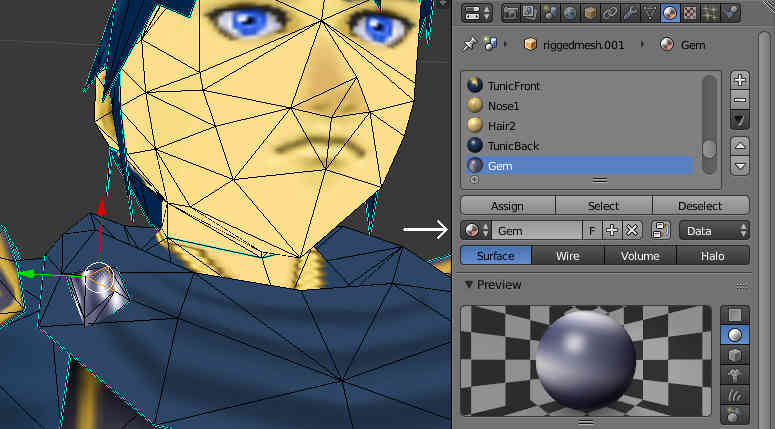  Now it will be the color of the equipped tunic in-game. Keep this in mind for any future play-as where you may want to have a texture change color based on the equipped tunic. You get the best results if the base texture is white. For example, here is one of Link's tunic textures:  Exporting is simple, but there are some things that are easy to forget. Remember Link? Yeah, we don't need him in the scene anymore. In Object Mode, use Alt H to unhide everything. Select and delete Link. Unless you have some other weird meshes floating around, we should be good to go. The main rigged Marth model should be named riggedmesh. This is a requirement for the converter. The other meshes in the scene should be Fist.L, Fist.R, Hand.Bottle.L, FPS.Forearm.L, FPS.Hand.L, FPS.Forearm.R, and FPS.Hand.R. If you meet all those prerequisites, select the skeleton (not the mesh!) in Object Mode, then go to File > Export > Extended OBJ (.objex). Leave all the settings the same, and export Marth.objex. If you get errors, make sure all vertices are assigned, or fiddle around until it works. We'll be using zzconvert-gui for the conversion. If you're command-line savvy and want to use the command-line version, go for it. 8) Make sure you have these settings: 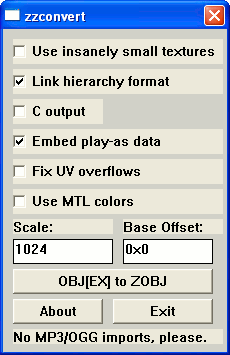 Now you click the OBJ[EX] to ZOBJ button and follow the guides. Save as Marth.zobj. If it works, you'll get a window like this: 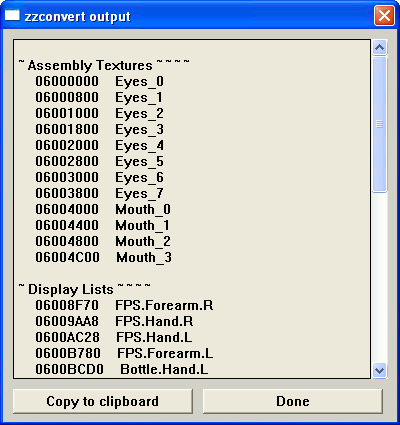 Assembly textures? What are those? 8) Click Done to exit the program. Now we're going to open zzplayas. Command-line users, take to zzobjman. 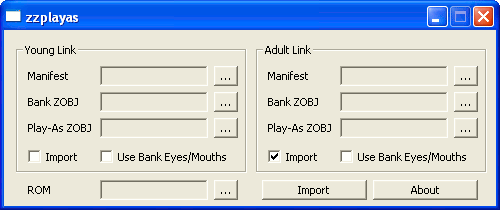 If you made it this far, I assume you can read. But I'll guide you anyway. We're replacing Adult Link, so the Import checkbox should be selected only below Adult Link. For Manifest, use Marth-manifest.txt (found at the top of this tutorial in case you missed it). For Bank ZOBJ, use CrookedPoe's object_link_boy_optimized.zobj. For Play-As ZOBJ, use Marth.zobj. For ROM, use your copy of the debug rom. If you're using the latest revision of zzplayas, you'll be able to specify a ZZRP file if you desire to use in combination with zzromtool. Then click Import. If everything worked properly, Adult Link should be replaced with Marth. Congratulations on your import! |
Guides >